1. Understanding Essential Oils and Their Benefits
Essential oils have become a go-to ingredient in homemade face masks, especially for those who love holistic beauty routines. But what exactly are they, and why do so many Americans add them to their DIY skincare? Let’s explore!
What Are Essential Oils?
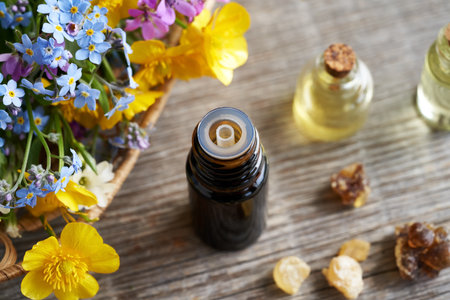
Essential oils are concentrated liquids made from plants. They’re extracted through methods like steam distillation or cold pressing, which helps capture the plant’s natural fragrance and beneficial compounds. These oils aren’t just for aromatherapy—they’re packed with properties that can benefit your skin.
How Are Essential Oils Made?
The process of making essential oils involves taking leaves, flowers, bark, or other parts of a plant and using steam or pressure to release the plant’s oils. The result is a potent liquid full of the plant’s natural goodness. Because these oils are highly concentrated, you only need a few drops in your face mask recipes.
Why Use Essential Oils for Skin?
Different essential oils offer unique benefits for your skin. Some help calm redness, others fight acne-causing bacteria, while some boost hydration or even skin tone. That’s why they’re such favorites in natural skincare routines across the U.S.—they give you the power to customize your beauty care at home.
Popular Essential Oils for Skincare
| Essential Oil | Main Skin Benefit | Why It’s Popular |
|---|---|---|
| Tea Tree | Blemish control, fights acne | A favorite for oily and acne-prone skin due to its antibacterial power |
| Lavender | Soothes irritation, calms redness | Loved for its calming scent and gentle effect on sensitive skin |
| Rosehip | Boosts hydration, evens skin tone | Packed with vitamins A & C, great for anti-aging routines |
| Frankincense | Tightens pores, reduces fine lines | A staple in holistic beauty for its rejuvenating effects |
| Chamomile | Reduces inflammation, soothes sensitive skin | Perfect for calming stressed-out skin and reducing puffiness |
| Lemon | Brightens complexion, gently exfoliates | A popular pick-me-up oil (always use diluted and avoid sun exposure after use) |
Quick Tips:
- Always dilute essential oils with a carrier oil (like jojoba or coconut oil) before applying to your face.
- Do a patch test first to make sure you don’t react to a new oil.
- If you’re pregnant or have allergies, check with a healthcare provider before using essential oils.
With their wide range of benefits and easy customization, it’s no wonder essential oils are a top choice in American DIY beauty routines! In the next section, we’ll dive into how to choose the best oils for your unique skin type.
2. Choosing the Right Essential Oils for Your Skin Type
Picking the right essential oil can make or break your homemade face mask. Not every oil works for every skin type, so it’s important to know which ones are best for you. Below, youll find suggestions tailored to common skin types and tips on blending them safely for gentle yet effective results.
Best Essential Oils by Skin Type
| Skin Type | Recommended Essential Oils | Main Benefits |
|---|---|---|
| Oily | Tea Tree, Lemon, Lavender, Geranium | Controls excess oil, fights acne-causing bacteria, calms inflammation |
| Dry | Rose, Sandalwood, Chamomile, Frankincense | Deeply hydrates, soothes irritation, supports skin repair |
| Sensitive | Chamomile, Lavender, Rose, Neroli | Reduces redness, calms itching, minimizes allergic reactions |
| Combination | Geranium, Lavender, Ylang Ylang, Patchouli | Balances oil and dry zones, promotes even skin tone |
Tips for Balancing Efficacy with Gentle Care
- Dilute Properly: Always mix essential oils with a carrier oil (like jojoba or sweet almond) before adding to your face mask base. A typical dilution is 1-2 drops of essential oil per tablespoon of carrier or mask ingredient.
- Patch Test First: Before applying any new blend to your face, test a small amount on your inner arm to check for irritation or allergies.
- Avoid Harsh Oils: Some oils like cinnamon or clove are too strong for facial use. Stick with gentler options unless you have experience blending oils.
- Less Is More: Start with fewer drops—essential oils are potent! You can always add more if needed.
- Check for Purity: Use high-quality, pure essential oils without synthetic additives for best results and safety.
Your Next Step: Blending for Your Unique Needs
If you have multiple skin concerns (like dry patches and an oily T-zone), try combining recommended oils from each relevant category in your mask. This way you get targeted benefits while keeping your routine simple and natural. Always remember that consistency and gentle care go a long way in achieving glowing skin!

3. Safety Tips and Best Practices
Using essential oils in homemade face masks can be both fun and beneficial, but its important to follow some key safety guidelines to avoid skin irritation or other unwanted effects. Here’s what you need to know before you start mixing up your own blends at home.
Understanding Dilution Rates
Essential oils are highly concentrated and should never be used undiluted on the skin. Always mix them with a carrier oil (like jojoba, coconut, or sweet almond oil) or another base ingredient in your mask. Here’s a quick guide:
| Mask Amount | Essential Oil Drops | Carrier/Base Amount |
|---|---|---|
| 1 tablespoon (about 15ml) | 1-2 drops | 1 tbsp of carrier or base (yogurt, honey, etc.) |
| 1/4 cup (about 60ml) | 4-6 drops | 1/4 cup of carrier or base |
This keeps the concentration low and reduces the risk of irritation.
Always Do an Allergy Patch Test
Before applying any new essential oil blend to your face, do a patch test:
- Dab a small amount of the diluted mixture onto your inner forearm or behind your ear.
- Wait 24 hours to see if there is any redness, itching, or swelling.
- If you experience any reaction, do not use that blend on your face.
Proper Storage for Essential Oils and DIY Masks
Storing your essential oils and homemade masks correctly will help keep them fresh and safe to use:
- Essential oils: Store in dark glass bottles away from heat and sunlight.
- Masks with fresh ingredients: Use immediately or store in the fridge for up to 24 hours. Always check for changes in smell or color before using leftovers.
- Avoid contamination: Use clean tools and containers every time you make a new batch.
Extra Safety Reminders
- Avoid using essential oils near the eyes, inside the nose, or on broken skin.
- Certain oils like cinnamon, clove, and oregano are very strong—use with extra caution or avoid them altogether in facial recipes.
- If you’re pregnant, nursing, or have sensitive skin, consult with a healthcare provider before trying new essential oils.
4. Step-by-Step: DIY Essential Oil Face Mask Recipes
If you’re ready to try essential oils in your skincare routine, making a homemade face mask is a fun and easy way to start! Here are some simple recipes using essential oils and ingredients you can easily find at most American grocery stores or already have at home.
Essential Supplies
| Item | Why You Need It |
|---|---|
| Mixing bowl | For blending ingredients smoothly |
| Spoon or spatula | To mix and apply the mask |
| Measuring spoons | To get the right amounts for safety and effectiveness |
| Face towel | For clean-up and drying your skin afterwards |
Recipe 1: Calming Oatmeal & Lavender Mask (For Sensitive Skin)
Ingredients:
- 2 tablespoons ground oats (use old-fashioned rolled oats, ground in a blender)
- 1 tablespoon plain yogurt (unsweetened)
- 1 teaspoon honey
- 2 drops lavender essential oil
Instructions:
- Add oats, yogurt, and honey to your mixing bowl. Stir until combined.
- Add 2 drops of lavender oil. Mix well.
- Apply evenly to clean face, avoiding eyes and lips.
- Leave on for 10-15 minutes.
- Rinse off with lukewarm water and pat dry with a towel.
Recipe 2: Brightening Honey & Lemon Mask (For Dull Skin)
Ingredients:
- 1 tablespoon raw honey
- 1 teaspoon lemon juice (freshly squeezed)
- 2 drops tea tree essential oil
- 1 tablespoon plain yogurt (optional for extra moisture)
Instructions:
- Add honey, lemon juice, and yogurt (if using) to the bowl.
- Add 2 drops of tea tree oil. Mix thoroughly.
- Smooth onto your face, avoiding sensitive eye area.
- Let sit for 10 minutes.
- Rinse well with warm water and dry gently.
Recipe 3: Deep-Cleansing Clay & Tea Tree Mask (For Oily or Acne-Prone Skin)
Ingredients:
- 1 tablespoon bentonite clay (available at most health stores or online)
- 1 tablespoon apple cider vinegar or water (for sensitive skin)
- 2 drops tea tree essential oil
Instructions:
- Add clay to the mixing bowl.
- Slowly add apple cider vinegar or water until you reach a smooth, spreadable paste.
- Add 2 drops of tea tree oil. Stir well.
- Apply an even layer to your face, focusing on oily areas like the T-zone.
- Allow to dry for about 10 minutes. If it feels too tight or uncomfortable, rinse off sooner.
- Wash off with warm water and pat dry.
Troubleshooting & Tips for Best Results
- Patching First: Always do a patch test on your inner arm before using any new essential oil blend on your face.
- No Overuse: Use these masks once or twice a week only—more frequent use can irritate skin.
- Avoid Eyes & Lips: Essential oils should never go near your eyes or mouth. Always avoid these areas when applying masks.
Your At-Home Spa Experience Awaits!
Create your own spa night by lighting a candle, playing soft music, and relaxing while your mask works its magic. Homemade face masks are a great way to pamper yourself with natural ingredients you trust!
5. Aftercare and Incorporating Masks Into Your Routine
Best Aftercare Tips for Your Skin Post-Mask
Taking care of your skin after using an essential oil face mask is just as important as the mask itself. Here’s what you should do to keep your skin healthy and glowing:
- Rinse Thoroughly: Always use lukewarm water to gently wash off the mask, ensuring no residue is left behind.
- Pat Dry, Don’t Rub: Use a soft towel to pat your face dry. Avoid rubbing, which can irritate freshly treated skin.
- Apply a Gentle Toner: Choose an alcohol-free toner to help restore your skin’s natural pH balance.
- Moisturize Immediately: Lock in hydration with a lightweight moisturizer or facial oil suitable for your skin type.
- Sunscreen Is a Must: If you’re heading out, apply sunscreen—even if it’s cloudy. Essential oils can make skin more sensitive to sunlight.
How Often Should You Use Essential Oil Face Masks?
Integrating masks into your routine depends on your skin’s needs and sensitivity. Here’s a quick guide:
| Skin Type | Recommended Frequency | Notes |
|---|---|---|
| Sensitive/Dry | Once a week | Choose calming oils like chamomile or lavender |
| Normal/Combination | 1-2 times per week | Rotate oils based on current needs (hydration, clarity, etc.) |
| Oily/Acne-Prone | Up to 2 times per week | Avoid overly rich oils; tea tree and rosemary are great options |
Practical Tips for Fitting Masks Into an American Skincare Routine
- Create a “Self-Care Sunday” Ritual: Set aside time once a week to unwind and treat your skin—this makes masking feel less like a chore and more like pampering.
- Keep It Simple: You don’t have to overhaul your entire routine. Add the mask step after cleansing but before moisturizing.
- Tune In to Your Skin: Listen to how your skin reacts post-mask. If you notice irritation, reduce frequency or swap out essential oils for gentler alternatives.
- Makes Masking Social: Invite friends or family for a DIY spa night at home—masking can be fun and relaxing together!
Your Weekly Essential Oil Face Mask Schedule Example
| Day of Week | Mask Activity |
|---|---|
| Sunday | Pampering mask with lavender & oatmeal (relaxation) |
| Wednesday | (Optional) Clarifying mask with tea tree & clay (for oily/acne-prone skin) |
Remember:
No matter your schedule, consistency is key—but always adjust based on how your skin feels. With the right aftercare and routine, essential oil face masks can become a rewarding part of your American skincare regimen.