Prepping Your Skin for a Smooth Wax
When it comes to DIY waxing, the secret to minimizing pain starts long before you even open your wax kit. American skincare experts consistently emphasize that proper skin preparation is crucial not just for reducing discomfort, but also for safeguarding your skin’s overall health. Begin by cleansing the area thoroughly with a gentle, fragrance-free cleanser to remove any dirt, oil, or residue that could interfere with wax adhesion. Next, lightly exfoliate using a mild scrub or exfoliating mitt—this step helps slough off dead skin cells and allows the wax to grip hairs more effectively rather than pulling on the skin. Exfoliation should be done at least 24 hours prior to waxing to avoid irritation. Industry insiders highlight that skipping this pre-wax prep is one of the most common mistakes made by at-home waxers in the U.S., often leading to unnecessary pain and post-wax bumps. By prioritizing these foundational steps, you set yourself up for a smoother, less painful waxing session—reflecting the American value placed on proactive self-care and healthy skin.
Choosing the Right Wax and Tools
When it comes to minimizing pain during your at-home waxing sessions, selecting the right type of wax and using quality tools is crucial. The U.S. market offers a wide variety of waxing products, each catering to different skin types, hair textures, and personal preferences. Understanding these options can help you make an informed choice that not only enhances effectiveness but also reduces discomfort.
Popular Wax Types Across the U.S.
| Wax Type | Best For | Key Benefits | Pain Level |
|---|---|---|---|
| Hard Wax | Sensitive areas (face, bikini, underarms) | No strips needed, adheres to hair not skin | Low to Moderate |
| Soft Wax (Strip Wax) | Larger areas (legs, arms, back) | Covers large surfaces quickly | Moderate to High |
| Sugar Wax | All skin types, especially sensitive skin | Naturally derived, easy clean-up with water | Low |
| Fruit or Cream-Based Wax | Dry or mature skin | Infused with vitamins, gentle on skin | Low to Moderate |
Expert-Recommended Tools for a Smoother Experience
Professional estheticians agree: investing in high-quality tools can significantly ease the waxing process. Here’s what you’ll want in your toolkit:
- Wax Warmer: Ensures consistent temperature for even application and minimizes burns.
- Pre-Wax Cleanser: Removes oils and preps skin for better wax adhesion.
- Wooden Applicators: Allow for precise application—never double dip!
- Cotton Strips (for soft wax): Provide strong grip for swift removal.
- Tweezers: Handy for touch-ups after waxing.
- Aloe Vera Gel or Post-Wax Oil: Soothes irritation and reduces redness post-waxing.
A Market Trend: At-Home Kits on the Rise
The demand for all-in-one at-home waxing kits has surged in recent years, reflecting Americans’ preference for convenience and cost savings. These kits often include everything needed—from pre-wax treatments to soothing gels—making them a smart choice for DIYers focused on comfort and efficiency.
The Bottom Line
Selecting the right wax formula and investing in reliable tools are foundational steps in minimizing pain during at-home waxing. With so many choices available across the U.S., consider your skin type, target area, and sensitivity level before purchasing. Expert-recommended products not only make waxing more bearable but also ensure professional-quality results right at home.
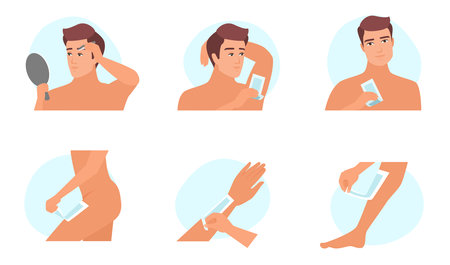
3. Techniques That Minimize Pain
Waxing at home doesn’t have to mean bracing yourself for unnecessary pain—especially if you know the right methods. Seasoned estheticians emphasize that technique is everything when it comes to minimizing discomfort during a DIY waxing session. Here are expert-approved tips that align with America’s growing love for at-home beauty solutions:
Choose the Right Wax and Prep Thoroughly
Experts recommend using hard wax or sugar wax, as these formulas tend to grip hair—not skin—making removal less painful. Always test the temperature on your wrist; too hot can cause burns, while too cool won’t adhere properly. Cleanse and lightly exfoliate your skin before waxing to remove oils and dead skin cells. This preps your canvas and helps the wax adhere to hair more effectively.
Apply Wax in the Direction of Hair Growth
One of the most common mistakes among beginners is applying wax against the direction of hair growth. For minimal pain, always spread a thin, even layer of wax in the same direction your hair grows. This allows the wax to encapsulate each strand fully, making removal smoother and reducing tugging on the skin.
Remove Wax Quickly and Close to Skin
The “rip it off like a Band-Aid” advice holds true here. Hold your skin taut with one hand and use the other to pull the strip or hardened wax parallel and close to the surface of your skin—not upward. This reduces strain and helps avoid bruising or breaking hairs, which can be more painful and lead to ingrown hairs.
Breathe and Distract Yourself
Pro waxers often tell clients to take a deep breath right before removing the strip and exhale as they pull—this simple trick helps manage pain perception. Many Americans multitask by playing their favorite playlist or streaming a comfort show during at-home waxing, making the experience feel less clinical and more like self-care.
By following these insider techniques from waxing professionals, you can transform your DIY waxing routine into an efficient, less painful part of your beauty regimen—right at home.
4. Managing Pain Like a Pro
If you’re looking to minimize pain during your at-home waxing sessions, you’re not alone. Many Americans turn to both over-the-counter (OTC) solutions and trusted home remedies to make the experience more comfortable. Here’s a breakdown of popular, safe, and accessible options that can help you manage discomfort like a pro.
Popular Over-the-Counter Solutions
Pharmacies across the US offer various OTC products specifically formulated for pain relief before and after waxing. Here are some commonly used options:
| Product | Main Ingredient | How to Use |
|---|---|---|
| Numbing Creams (e.g., Lidocaine 4%) | Lidocaine | Apply a thin layer 30-45 minutes before waxing; avoid broken skin |
| Cooling Gels (e.g., Aloe Vera gel) | Aloe Vera | Soothe skin immediately after waxing to reduce inflammation |
| Pain Relief Sprays | Benzocaine or Menthol | Spray directly on the waxed area for instant relief post-waxing |
| Ibuprofen/Acetaminophen | NSAID/Analgesic | Take 30-60 minutes prior to waxing for systemic pain reduction (consult dosage guidelines) |
Numbing Creams: What You Need to Know
Numbing creams are a go-to solution in the US for sensitive areas or first-time waxers. Look for products with at least 4% lidocaine for effective topical numbing. Always follow directions—do not apply to broken or irritated skin, and test a small patch first to rule out allergic reactions.
Home Remedies That Work
If you prefer natural alternatives, several home remedies have gained popularity for their simplicity and safety:
- Cold Compress: Applying an ice pack pre- or post-wax can numb nerve endings and ease pain.
- Coconut Oil: Used post-wax to soothe, hydrate, and reduce redness naturally.
- Baking Soda Paste: Some swear by a gentle baking soda paste (mixed with water) for calming irritated skin after waxing.
- Tight Clothing Avoidance: Wearing loose-fitting clothes after waxing prevents additional friction and irritation.
Your Pre-Wax Checklist for Pain Minimization
- Avoid caffeine and alcohol before waxing—they may heighten sensitivity.
- Exfoliate gently 24 hours prior to remove dead skin cells and allow smoother hair removal.
- Ensure your skin is clean, dry, and free of lotions or oils before applying wax.
The Takeaway: Layer Your Strategies for Best Results
The key to minimizing pain during DIY waxing is combining proven OTC solutions with tried-and-true home remedies. By planning ahead and using these expert-backed techniques, you can enjoy smoother results with significantly less discomfort—all from the comfort of your own home.
5. Aftercare Essentials for Long-Lasting Comfort
Trending Aftercare Routines to Follow
Proper aftercare is just as crucial as the waxing technique itself if you want to minimize discomfort and keep your skin feeling its best. Across the U.S., beauty enthusiasts are embracing multi-step aftercare routines that prioritize both immediate relief and long-term skin health. Start by gently cleansing the waxed area with a fragrance-free, pH-balanced cleanser. Pat—don’t rub—the skin dry with a clean, soft towel. Next, apply a soothing serum or lotion formulated specifically for post-wax care; look for ingredients like aloe vera, chamomile, or calendula to calm irritation and reduce redness.
Cooling Treatments: Soothe and Calm
One of the most popular American trends for soothing post-wax skin is applying cooling treatments right after waxing. Consider using reusable gel packs straight from the fridge or over-the-counter hydrogel masks designed for sensitive areas. Lay the cool pack on the waxed area for 10-15 minutes to help constrict blood vessels, ease inflammation, and numb residual stinging. Avoid ice cubes directly on the skin, as they can cause mild burns or worsen sensitivity.
Recommended American-Made Products for Post-Wax Relief
If you’re looking to support local brands while pampering your skin, several American-made products have earned rave reviews for their post-wax benefits. Try Bliss Bump Attendant Ingrown Eliminating Pads for exfoliation and prevention of ingrown hairs, or reach for Eucerin Advanced Repair Cream—a dermatologist-recommended staple in many U.S. households—for deep hydration without heavy fragrances. For those who prefer natural options, Herbivore Botanicals’ After Sun Soothing Aloe Mist offers instant relief with minimal ingredients sourced in the States.
By combining trending aftercare routines, cooling treatments, and top-rated American-made products, you can significantly reduce pain and promote healthy, glowing skin after every DIY waxing session.
6. Common Mistakes to Avoid
When it comes to DIY waxing, even the most determined at-home beauty enthusiast can fall victim to common mistakes that make the process unnecessarily painful. Industry experts and seasoned American users emphasize the importance of knowing what NOT to do before, during, and after waxing to ensure a smoother—and less painful—experience.
Before Waxing: Skipping Preparation
Don’t skip skin prep: Failing to clean and exfoliate your skin beforehand can leave behind oils, sweat, or dead skin cells that prevent wax from adhering properly. Always start with freshly washed, dry skin, and gently exfoliate to reduce the risk of ingrown hairs.
Avoid Waxing on Sensitive Skin
If you’ve recently tanned, used retinol-based products, or undergone chemical peels, wait until your skin recovers. Waxing compromised skin leads to excessive pain and increases the risk of irritation and injury.
During Waxing: Wrong Technique
Poor application technique: Applying wax in the wrong direction or removing strips incorrectly is a top pain culprit. Always apply wax in the direction of hair growth and remove it swiftly against the direction—never pull slowly, as this prolongs discomfort.
Don’t Double-Dip Applicators
This isn’t just an industry no-no; it’s a hygiene issue that can cause infections. Always use a new applicator for each dip into your wax pot.
After Waxing: Ignoring Aftercare
No aftercare equals more pain: Skipping soothing lotions or aloe-based gels post-wax can leave your skin red and inflamed. Avoid hot showers, tight clothing, and workouts for at least 24 hours after waxing to minimize irritation.
Avoid Touching and Picking
Your freshly waxed skin is sensitive. Touching with dirty hands or picking at any bumps will only invite bacteria and prolong healing.
By steering clear of these all-too-common missteps—and following pro-approved advice—you’ll not only reduce pain but also get better results from your DIY waxing routine. Remember: A little preparation and care go a long way toward achieving smooth, comfortable skin at home.