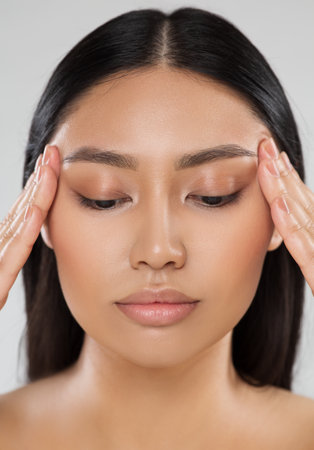
Introduction to Eyebrow Tinting Kits
Eyebrow tinting is a popular beauty treatment that enhances the color, shape, and definition of your brows. Whether you want to darken light brows, fill in sparse areas, or achieve a more polished look, eyebrow tinting can make a significant difference. While professional salon treatments are available, DIY eyebrow tinting kits offer an affordable and convenient alternative.
What Is Eyebrow Tinting?
Eyebrow tinting involves applying a semi-permanent dye to the brow hairs to create a fuller and more defined appearance. The dye typically lasts for several weeks, reducing the need for daily brow makeup. This process can be done at home using specially formulated eyebrow tinting kits.
Benefits of Eyebrow Tinting
There are many reasons why people choose to tint their eyebrows. Here are some key benefits:
- Enhanced Definition: Darker brows help frame your face and highlight your features.
- Time-Saving: No need to fill in your brows with makeup every day.
- Long-Lasting Results: Tint can last up to 4-6 weeks, depending on the product and care routine.
- Cost-Effective: DIY kits are much cheaper than salon treatments.
- Customizable Shades: Many kits allow you to adjust the color intensity to suit your preference.
Why Choose DIY Eyebrow Tinting?
While professional treatments are great, at-home eyebrow tinting offers several advantages:
| DIY Tinting | Salon Tinting |
|---|---|
| More affordable | Can be expensive over time |
| Convenient – do it anytime at home | Requires booking an appointment |
| Easy to touch up as needed | You may have to wait between appointments |
| A variety of shades available for personal customization | Limited options based on salon availability |
Is DIY Eyebrow Tinting Right for You?
If you’re looking for an easy way to enhance your brows without spending time and money at a salon, DIY eyebrow tinting could be the perfect solution. With the right kit and proper application techniques, you can achieve beautiful, natural-looking results from the comfort of your home.
What’s Next?
Now that you understand the basics of eyebrow tinting and its benefits, lets dive into our top picks for the best DIY eyebrow tinting kits available today!
2. How to Choose the Right Eyebrow Tinting Kit
Finding the perfect eyebrow tinting kit can make all the difference in achieving salon-quality brows at home. With so many options available, its essential to consider key factors like skin tone, hair color, ingredients, and ease of use. Below, we break down what you need to know before making your purchase.
Skin Tone and Hair Color
Your natural skin tone and hair color play a significant role in choosing the right brow tint shade. The goal is to create a look that enhances your features without appearing too harsh or unnatural.
| Skin Tone | Recommended Brow Tint Shades |
|---|---|
| Fair Skin | Light brown, taupe, soft blonde |
| Medium Skin | Medium brown, ash brown |
| Olive Skin | Dark brown, warm brown |
| Dark Skin | Deep brown, black-brown |
Ingredients Matter
If you have sensitive skin or prefer natural beauty products, checking the ingredient list is crucial. Some kits contain harsh chemicals like ammonia or peroxide, which may cause irritation.
Safe and Gentle Ingredients to Look For:
- Plant-based dyes: These are gentler on the skin and provide a more natural look.
- Aloe vera & chamomile: Help soothe and nourish the skin during application.
- No ammonia or peroxide: Ideal for sensitive skin types to prevent irritation.
Ease of Use
If youre new to DIY brow tinting, choosing a beginner-friendly kit is essential. Look for kits that include everything you need, such as pre-measured dye, applicators, and clear instructions.
What to Look for in a User-Friendly Kit:
- Pre-mixed formula: No need for complicated mixing.
- Easy-to-use applicator: Brushes or wands that allow precise application.
- Quick processing time: Tints that develop in 5-10 minutes save time.
- Long-lasting results: A good tint should last at least 2-4 weeks.
By considering these factors—skin tone, hair color, ingredients, and ease of use—you can confidently choose an eyebrow tinting kit that suits your needs and enhances your natural beauty.

3. Top Eyebrow Tinting Kits for DIY Brows
If youre looking for the best eyebrow tinting kits to achieve salon-quality results at home, weve got you covered. Below, we review some of the top options available, highlighting their pros and cons to help you make an informed choice.
1. Godefroy Instant Eyebrow Tint
Overview
This kit is a popular choice among DIY brow enthusiasts. It provides long-lasting color and is designed for easy application.
Pros
- Long-lasting results (up to 6 weeks)
- Easy-to-use pre-measured capsules
- Great for covering gray hairs
Cons
- Limited shade range
- Might be too strong for sensitive skin
2. RefectoCil Eyebrow Tint Kit
Overview
A professional-grade tinting kit that delivers natural-looking results with multiple shade options.
Pros
- Available in various shades
- Semi-permanent formula lasts up to 6 weeks
- Suitable for sensitive skin when used with the right developer
Cons
- Takes some practice to apply correctly
- The developer must be purchased separately
3. Ardell Brow Tint Kit
Overview
A great budget-friendly option that provides quick and easy results.
Pros
- Affordable price point
- No need for a professional applicator—simple to use
- Lasts up to 2 weeks
Cons
- Might require frequent touch-ups compared to other brands
- Certain shades can appear darker than expected
Comparison Table: Best Eyebrow Tinting Kits for DIY Brows
| Tinting Kit | Main Benefit | Lifespan of Tint | Sensitivity Friendly? | Difficult to Use? |
|---|---|---|---|---|
| Godefroy Instant Eyebrow Tint | Covers gray hairs well, long-lasting color | Around 6 weeks | No (May irritate sensitive skin) | No (Pre-measured capsules make it easy) |
| RefectoCil Eyebrow Tint Kit | Diverse shade options, professional-grade quality | Around 6 weeks | Yes (If used with the correct developer) | Slightly difficult (Requires mixing and precision) |
| Ardell Brow Tint Kit | A budget-friendly option with easy application process | Around 2 weeks | No (Some users report irritation) | No (Simple step-by-step process) |
Selecting the best eyebrow tinting kit depends on your needs, whether its longevity, ease of use, or affordability. Each of these kits offers something unique, so consider what matters most before making your decision.
4. Step-by-Step Guide to DIY Eyebrow Tinting
Tinting your eyebrows at home is easier than you might think! With the right tools and a bit of patience, you can achieve salon-quality results without leaving your house. Follow this simple step-by-step guide to safely and effectively tint your brows.
What Youll Need
- An eyebrow tinting kit (make sure it includes the dye, developer, and applicator)
- Cotton swabs or pads
- Petroleum jelly (to prevent staining around your brows)
- A spoolie brush or angled brush for application
- A timer or phone to track time
- Makeup remover or micellar water
Step 1: Prep Your Brows
Start by cleaning your eyebrows with a gentle cleanser to remove any oils or makeup residue. Dry them completely before moving on.
Step 2: Apply Petroleum Jelly
Dab a small amount of petroleum jelly around your eyebrows to create a barrier that prevents unwanted staining on your skin.
Step 3: Mix the Tint
Follow the instructions in your eyebrow tinting kit to mix the dye and developer properly. Make sure the consistency is smooth and not too runny.
Step 4: Apply the Tint
Using an angled brush or spoolie, carefully apply the tint to your brows, following their natural shape. Start with a light layer and build up if needed.
Step 5: Set a Timer
The processing time varies depending on the brand and desired intensity. Typically, it ranges from 5 to 10 minutes. Check the instructions in your kit for precise timing.
Tinting Time Guide
| Brow Color | Recommended Time |
|---|---|
| Light Brown | 5 minutes |
| Medium Brown | 7 minutes |
| Dark Brown/Black | 10 minutes |
Step 6: Remove Excess Dye
Dampen a cotton pad with water and gently wipe off the excess dye. Be careful not to rub too hard.
Step 7: Clean Up & Moisturize
If there are any stains on your skin, use a makeup remover or micellar water to clean them up. Finish by applying a hydrating eyebrow serum or lightweight moisturizer.
Pro Tips for Best Results
- If youre unsure about how dark you want your brows, start with less time and gradually increase as needed.
- Avoid washing your brows with harsh cleansers for at least 24 hours after tinting to allow the color to set.
- If you make a mistake, use a damp cotton swab immediately to correct it before the dye sets.
- Patching up sparse areas with an eyebrow pencil can help enhance the final look after tinting.
Tinting your brows at home can be quick and easy when done correctly. With practice, youll find the perfect shade and technique that works best for you!
5. Tips for Long-Lasting and Natural-Looking Results
Getting the perfect DIY eyebrow tint is just the first step—maintaining it properly ensures your brows stay bold and beautiful for as long as possible. Follow these expert tips to extend the life of your tint, avoid common mistakes, and enhance your overall look.
How to Maintain Your Eyebrow Tint
Proper aftercare is essential for making your eyebrow tint last longer. Here are some key maintenance tips:
| Tip | Description |
|---|---|
| Avoid Water for 24 Hours | Keep your brows dry for at least a full day after tinting to allow the color to set properly. |
| Use Gentle Cleansers | Avoid harsh face washes or exfoliants that can cause the tint to fade quickly. |
| Avoid Oil-Based Products | Cleansers, makeup removers, and skincare products with oil can break down the tint faster. |
| Apply a Clear Brow Gel | A clear brow gel helps seal in the color and keeps hairs in place. |
| Avoid Excessive Sun Exposure | UV rays can fade the tint faster, so wear sunscreen or a hat when outdoors. |
Common Mistakes to Avoid
Avoid these common errors to ensure your DIY brow tint looks flawless:
- Leaving the Tint on Too Long: Over-processing can result in overly dark or unnatural-looking brows.
- Selecting the Wrong Shade: Always choose a shade close to your natural brow color for the most natural effect.
- Ineven Application: Use a fine brush or applicator to distribute the product evenly.
- Tinting Over Makeup or Skincare Products: Clean brows before applying tint to ensure even absorption.
- Tinting Too Often: Over-tinting can lead to dryness and damage; wait at least 4-6 weeks between applications.
Tips for Enhancing Your Brows Post-Tinting
If you want fuller, more defined brows after tinting, consider these enhancement tips:
- Brow Pencils & Powders: Lightly fill in sparse areas with a brow pencil or powder that matches your tinted shade.
- Brow Serums: Use a growth serum to keep brows healthy and full over time.
- Brow Lamination: Combine tinting with lamination for a sleek, lifted effect.
- Tweezing & Trimming: Maintain a clean shape by plucking stray hairs and trimming long ones.
A well-maintained eyebrow tint enhances your natural beauty while saving time on daily makeup routines. By following these simple care tips, you can enjoy long-lasting, beautifully tinted brows without frequent touch-ups!