1. Choosing the Right Eyebrow Tint
Finding the perfect eyebrow tint is the first step to achieving salon-quality results at home. The right tint should complement your skin tone and hair color while giving you a natural, polished look. There are several types of eyebrow tints available, each offering different benefits.
Selecting the Best Shade for Your Skin Tone and Hair Color
Choosing the correct shade is crucial for a natural appearance. Here’s a simple guide to help you pick the best color:
| Hair Color | Recommended Eyebrow Tint Shade |
|---|---|
| Blonde | Light brown or taupe |
| Light Brown | Medium brown |
| Dark Brown | Dark brown or soft black |
| Black | Soft black or dark brown |
| Red Hair | Auburn or warm brown |
| Gray Hair | Ash brown or soft taupe |
Differentiating Between Various Eyebrow Tint Formulas
The type of formula you choose depends on your preference, how long you want the tint to last, and how intense you want the color to be.
Semi-Permanent Dyes:
This type of tint lasts for about 4-6 weeks and provides a more defined look. It’s great if you want a long-lasting solution without daily touch-ups.
Tinted Gels:
If youre looking for something temporary, tinted gels are ideal. They provide color and hold in one product, making them perfect for everyday use.
Henna Tints:
A natural alternative, henna stains both the hair and skin beneath, creating a fuller appearance that lasts around 2 weeks. Its an excellent option for those who prefer plant-based products.
Selecting the right eyebrow tint ensures that your brows enhance your overall look while remaining natural and flattering. Once youve chosen your ideal shade and formula, youre ready to move on to the next step in your at-home brow tinting journey.
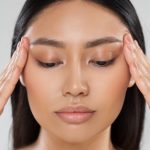
2. Prepping Your Eyebrows for Tinting
Before you start tinting your eyebrows, it’s crucial to prep them properly. This ensures an even application and helps prevent unwanted staining on your skin. Follow these simple steps to get salon-quality results at home.
Clean Your Eyebrows
Start by removing any makeup, oils, or dirt from your eyebrows. Use a gentle cleanser or micellar water to make sure your brows are completely clean and dry before applying the tint.
Shape Your Brows
If needed, tweeze or trim any stray hairs to define your brow shape. Avoid over-plucking since fuller brows take tint better and look more natural.
Protect Your Skin
To avoid staining the skin around your brows, apply a thin layer of petroleum jelly or a barrier cream around your eyebrows. Be careful not to get it on the hairs, as this can prevent the tint from adhering properly.
Eyebrow Prep Checklist
| Step | Description |
|---|---|
| Clean | Remove makeup, oil, and dirt for a smooth application. |
| Shape | Tweeze or trim excess hair for a defined look. |
| Protect | Apply petroleum jelly around brows to prevent staining. |

3. Step-by-Step Guide to Applying Eyebrow Tint
Follow a simple yet effective process to apply your tint evenly for salon-quality results, including expert application tips for long-lasting color. With the right technique and tools, you can achieve beautifully tinted brows that enhance your natural features.
What You’ll Need
Before you start, gather all the necessary supplies to ensure a smooth application process.
| Item | Purpose |
|---|---|
| Eyebrow tint kit | Main product for coloring your brows |
| Cotton swabs | For cleaning up any mistakes |
| Brow brush or spoolie | To evenly distribute the tint |
| Vaseline or barrier cream | Prevents staining around your brows |
| Clean tissue or cotton pads | For wiping off excess tint |
| Timer or phone stopwatch | Keeps track of processing time |
Step-by-Step Application Process
Step 1: Prep Your Brows and Skin
Cleansing your brows ensures the tint adheres properly. Use a gentle cleanser or micellar water to remove any oils or makeup residue. Then, apply a thin layer of Vaseline or barrier cream around your brows to prevent unwanted staining.
Step 2: Mix the Tint According to Instructions
If your kit requires mixing, follow the manufacturer’s guidelines carefully. Typically, you’ll combine the tint with a developer in the recommended ratio. Mix until you achieve a smooth consistency.
Step 3: Apply the Tint Evenly
Dip a brow brush or spoolie into the tint mixture and start applying from the inner corner of your brows, working outward. Use short strokes to mimic natural hair growth and ensure even coverage.
Step 4: Let It Develop for the Recommended Time
The processing time varies by brand, usually between 5-15 minutes. Check your kit’s instructions and use a timer to avoid over-processing, which could result in overly dark brows.
Step 5: Remove Excess Tint Carefully
Dampen a cotton pad with water and gently wipe away the tint, starting from the inner brow and moving outward. If any excess color remains on your skin, use a cotton swab with micellar water to clean up edges.
Step 6: Assess and Touch Up If Needed
If you want a deeper shade, repeat the application process in light layers rather than leaving the tint on longer than recommended. This helps control the intensity while maintaining a natural look.
Tips for Long-Lasting Color
- Avoid washing your brows with harsh cleansers for at least 24 hours after tinting.
- Mild face cleansers and oil-free products help maintain color longevity.
- If your brows fade too quickly, reapply every 2-3 weeks for consistent results.
- Avoid excessive sun exposure, as UV rays can cause premature fading.
- If needed, use an eyebrow gel to enhance shape while keeping color fresh.
This easy-to-follow method ensures salon-quality results without stepping out of your home. By following these steps and expert tips, you’ll enjoy long-lasting, beautifully tinted brows that frame your face perfectly.
4. Maintaining and Caring for Tinted Brows
Once youve achieved beautifully tinted brows, proper aftercare is essential to maintain their color and shape. With the right routine, you can extend the longevity of your tint and keep your brows looking fresh and defined for weeks.
Gentle Cleansing Techniques
Avoid using harsh cleansers or exfoliants on your brows, as these can strip away the tint prematurely. Instead, opt for a mild, fragrance-free cleanser and follow these steps:
| Step | Action |
|---|---|
| 1 | Dampen a cotton pad with lukewarm water. |
| 2 | Add a small amount of gentle facial cleanser. |
| 3 | Lightly dab around the brow area without scrubbing. |
| 4 | Rinse with water and pat dry with a soft towel. |
The Importance of Moisturizing
Keeps your brows hydrated to prevent dryness and fading. Use natural oils like castor oil or lightweight eyebrow serums to nourish the hairs while locking in the tint.
How to Apply Moisturizer to Your Brows
- Dab a small amount of oil or serum onto your fingertips.
- Gently massage it into your brows using upward strokes.
- Avoid applying too much product to prevent buildup.
Avoiding Common Brow Tinting Mistakes
Certain habits can cause your tint to fade faster than expected. Here’s what to watch out for:
- No Excessive Rubbing: Avoid rubbing or scratching your brows, especially when washing your face.
- Avoid Oil-Based Products: Oil-based skincare and makeup removers can break down the tint quickly.
- No Prolonged Sun Exposure: UV rays can fade the color, so wear sunscreen or a hat when outdoors.
- No Swimming Right Away: Chlorine and saltwater can accelerate fading, so avoid swimming for at least 24-48 hours after tinting.
Tint Touch-Ups
Your brow tint will naturally start to fade after a few weeks. To maintain their definition, consider touching up every 3-4 weeks using the same dye or scheduling professional refreshes as needed.
Brow Tint Longevity Tips:
- Avoid over-washing your face, especially around the brow area.
- If possible, sleep on your back to minimize friction against pillows.
- Use a spoolie brush daily to keep hairs in place without disrupting the tint.
Taking proper care of your tinted brows ensures they stay bold and beautiful for as long as possible. With these easy maintenance tips, you’ll enjoy salon-quality results right from home!
5. Common Mistakes to Avoid
To achieve a flawless, salon-quality eyebrow tint at home, its important to be aware of common mistakes that can impact your results. Avoiding these pitfalls will help you get a professional-looking finish without unnecessary frustration.
Choosing the Wrong Shade
Selecting the right shade is crucial for natural-looking brows. A color thats too dark can appear harsh, while one thats too light may not provide enough definition. Here’s a quick guide to help you pick the right shade:
| Hair Color | Recommended Brow Tint Shade |
|---|---|
| Blonde | One to two shades darker than your hair color |
| Brunette | A shade that matches or is slightly lighter than your hair color |
| Black | A soft black or dark brown (avoid jet black for a more natural look) |
| Redhead | A warm brown or auburn shade |
Over-Processing the Tint
Leaving the tint on for too long can result in overly dark or unnatural-looking brows. Always follow the recommended time on the product instructions and do a patch test beforehand to see how your skin reacts to the dye.
Uneven Application
If the tint is applied unevenly, some areas may appear darker than others, leading to an unbalanced look. To ensure even coverage:
- Cleansing: Make sure your brows are clean and free from oils before applying the tint.
- Pacing Yourself: Apply the tint slowly and carefully, starting with one brow and then moving to the other.
- Smoothing It Out: Use a spoolie brush or cotton swab to blend and distribute the tint evenly.
- Tidying Up: Quickly remove any excess tint around the edges with a damp cotton pad for precise shaping.
Irritation and Allergic Reactions
If you have sensitive skin, certain ingredients in eyebrow tints may cause irritation. To avoid this:
- Patch Test: Always do a patch test 24 hours before full application.
- Mild Formulas: Opt for tints designed for sensitive skin.
- Avoid Eye Contact: Be careful not to get any product in your eyes.
Tint Fading Too Quickly
If your tint fades faster than expected, consider these factors:
- Cleansers & Makeup Removers: Avoid oil-based products as they can break down the tint faster.
- Sweating & Swimming: Minimize exposure to excessive moisture right after tinting.
- Mild Cleansing: Wash your face gently to extend the longevity of your tinted brows.
Avoiding these common mistakes will help you achieve beautifully tinted brows that look polished and professionally done at home!