Understanding Your Brow Shape
Before diving into DIY eyebrow tinting, it’s essential to understand your natural brow shape. Whether your brows are arched, straight, rounded, or angled, identifying your unique shape is the foundation for achieving the best tinting results. Each brow shape interacts differently with color and can dramatically influence your overall look. For example, arched brows tend to create a more defined and dramatic appearance when tinted, while straight brows offer a softer, more natural effect. Rounded brows bring a gentle, youthful vibe, whereas angled brows provide structure and lift to the face. By recognizing your brow shape, you can customize your tinting technique and shade selection to enhance your natural features and avoid over-tinting or mismatched results. Taking this step not only makes the tinting process smoother but also ensures that your DIY results complement your facial structure in the most flattering way.
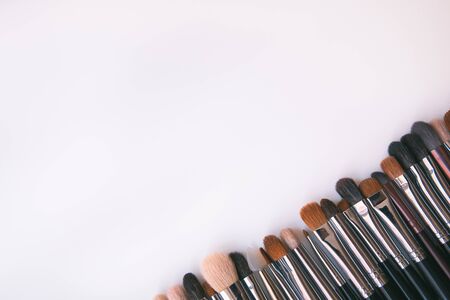
Choosing the Right DIY Tint Kit
When it comes to achieving salon-quality results at home, choosing the right eyebrow tint kit is essential. With so many options available in the U.S., it’s important to find a product that matches your brow shape, skin tone, and hair color for the most flattering effect. Below, we’ll highlight some of the top-rated DIY eyebrow tint kits and share expert advice on selecting the ideal shade for your unique features.
Top DIY Eyebrow Tint Kits in the U.S.
| Brand & Kit | Features | Best For |
|---|---|---|
| Godefroy Instant Eyebrow Tint | Pre-measured capsules, ammonia-free, long-lasting (up to 4 weeks) | Quick application, sensitive skin |
| Eylure Pro-Brow Dybrow | Natural-looking results, up to 12 applications per kit | Natural finish seekers, repeat use |
| Ardell Brow Tint | No mixing bowl required, vegan formula, easy-to-follow instructions | Beginners, cruelty-free preference |
| RefectoCil Cream Hair Dye | Professional-grade, customizable colors, waterproof formula | Custom shades, long-lasting wear |
| Billion Dollar Brows Tint Kit | Includes shaping tools, gentle formula, various shades available | All-in-one solution, first-timers |
Selecting Shades for Your Skin Tone and Hair Color
The secret to natural-looking brows is picking a tint shade that harmonizes with both your skin tone and hair color. Here’s a quick guide to help you choose:
| Skin Tone & Hair Color | Recommended Tint Shade |
|---|---|
| Fair skin + blonde/light brown hair | Ash blonde or light brown tint (avoid anything too dark) |
| Medium/tan skin + brown/dark blonde hair | Soft brown or medium brown (adds definition without harshness) |
| Olive skin + dark brown/black hair | Dark brown or soft black (matches depth without overpowering features) |
| Deep skin + black/dark brown hair | Natural black or deep brown (complements rich undertones) |
| Red/auburn hair (any skin tone) | Auburn or warm brown (enhances warmth and matches hair highlights) |
Tinting Tip:
If you’re unsure between two shades, always go lighter. It’s easier to build up intensity than to tone down overly dark brows. Also, consider your brow shape: fuller brows often look best with softer shades, while more defined arches can handle deeper tones. Remember to do a patch test before full application to avoid allergic reactions.
![]()
3. Essential Prep Before Tinting
Before diving into DIY eyebrow tinting, it’s crucial to set yourself up for success with the right prep work. Proper preparation not only ensures your brows look fabulous, but also helps avoid skin irritation or uneven results. Here’s what you need to do before you pick up that tint:
Patch Test: Your First Must-Do
Always start by performing a patch test, even if you’ve tinted your brows before. Apply a small amount of the tint to a discreet spot on your inner arm or behind your ear, then wait 24 hours to check for any allergic reactions. This simple step protects your skin and gives you peace of mind.
Thoroughly Cleanse Your Brows
Next, make sure your brows are squeaky clean. Use a gentle, oil-free cleanser to remove all traces of makeup, sunscreen, and natural oils from your brow area. Clean brows allow the tint to adhere evenly and last longer, giving you the best possible result.
Shape & Outline for Precision
Before applying the tint, take a moment to outline your ideal brow shape using a white eyeliner pencil or concealer. This step acts as a guide and keeps the tint from straying outside your desired shape—especially important if you have asymmetrical or uniquely shaped brows.
Extra Pro Tips
If you’re new to brow tinting, lay out all your tools (like angled brushes and cotton swabs) ahead of time so everything is within reach. And don’t forget: apply a thin layer of petroleum jelly around your brows to protect your skin from staining.
Preparation Sets You Up for Stunning Results
Taking these essential prep steps makes DIY eyebrow tinting safer and much more effective—regardless of whether your brows are full and bold or fine and delicate. With a little patience and care, you’ll be well on your way to salon-worthy brows at home!
4. Step-by-Step Tinting Techniques for Each Brow Shape
Achieving flawless, natural-looking brows at home starts with recognizing your unique brow shape and using the right tinting technique. Below, you’ll find easy-to-follow DIY tutorials tailored to four common brow shapes: straight, arched, rounded, and S-shaped. Each method includes tips for a seamless, salon-quality finish.
Straight Brows
- Prep: Cleanse brows and outline your desired shape with a white eyeliner pencil.
- Mix & Apply: Mix your tint according to package instructions. Use a flat angled brush to apply the tint in even strokes along the natural brow line. Focus on keeping edges crisp but soft for a natural effect.
- Blend: Soften the front of the brows by blending upward with a spoolie brush before the tint sets.
- Time & Remove: Leave the tint on as directed, then gently wipe off with a damp cotton pad.
Pro Tip:
Avoid over-darkening straight brows; keep the color lightest at the start and slightly deeper toward the tail.
Arched Brows
- Prep: Brush brows upward and outline your arch to accentuate your natural curve.
- Tint Application: Apply more product at the arch’s peak for definition, tapering the intensity towards the front and tail ends.
- Shaping: Use a precise brush for sharp lines under the arch and blend out above for softness.
- Timing: Check frequently; arches can appear harsh if tinted too long.
Pro Tip:
If you’re aiming for a bolder look, layer tint in two short sessions instead of one long application.
Rounded Brows
- Prep: Gently comb brows into their rounded shape; mark boundaries if needed.
- Tint Application: Apply tint with a small round-tipped brush following the curve of your brow. Avoid square edges—focus on smooth, sweeping motions.
- Smooth & Blend: Use a spoolie to blend at both ends for an even gradient effect.
- Remove Tint: Wipe off gently to preserve soft curves.
Pro Tip:
Avoid applying excess product at the brows tail; this keeps your look fresh and not overly dramatic.
S-Shaped Brows
- Prep: Outline your unique S-shape before starting. Use concealer around brows to prevent staining outside desired areas.
- Tint Application: Divide the brow into two sections—start with the inner curve, then move to the outer wave. Apply lightly and build up if needed.
- Sculpt & Blend: Use an angled brush for precision along each curve. Blend transitions for a unified look.
- Final Check & Remove: Double-check symmetry before removing tint from both sections simultaneously.
Pro Tip:
Tint S-shaped brows in stages—this helps avoid patchiness and ensures every angle pops naturally!
Brow Shape Tinting Quick Guide
| Brow Shape | Main Technique | Tint Placement | Main Goal |
|---|---|---|---|
| Straight | Even strokes, blended fronts | Lighter at start, deeper at tail | Keeps look soft yet defined |
| Arched | Precision at arch, layer color | Bolder peak, soft blend elsewhere | Emphasize natural arch without harshness |
| Rounded | Smooth sweeping motion | No hard edges or angles | Cultivate a gentle, approachable look |
| S-Shaped | Sculpt in sections, blend well | Crisp curves, unified tone | Highlight unique wave while keeping balance |
The key to great DIY eyebrow tinting is patience and customization. With these step-by-step techniques tailored to your brow shape—and by following our quick guide—you’ll achieve naturally beautiful results right at home!
5. Aftercare and Maintenance Tips
To keep your DIY eyebrow tint looking fresh and vibrant, aftercare is key. Here’s some expert advice to help you maintain those beautifully tinted brows and make your color last as long as possible.
Follow the Right Touch-Up Timeline
Generally, at-home brow tints last about 2-4 weeks, depending on your hair type and how often you wash your face. Plan for a touch-up every 3 weeks to keep your brows looking polished, but don’t overdo it—tinting too often can cause irritation or dry out your brow hairs.
Do’s After Tinting
- Keep brows dry for at least 24 hours: Avoid getting them wet right after tinting to allow the color to set properly.
- Moisturize regularly: Use a gentle, oil-free moisturizer around the brow area to keep skin healthy without fading the tint.
- Brush daily: Gently brush your brows with a spoolie to keep them neat and distribute natural oils for shine and strength.
- Use a mild cleanser: Stick to gentle, non-exfoliating cleansers that won’t strip away color prematurely.
Don’ts After Tinting
- Avoid exfoliating products: Scrubs, retinols, and acids can fade your tint faster—especially around the brow area.
- No oil-based makeup removers: Oils can break down the tint, so opt for micellar water or gentle wipes instead.
- Skip swimming or saunas right away: Chlorine and heat can lift the color before it fully sets, so wait at least a day before taking a dip or hitting the steam room.
Extra Tips for Different Brow Shapes
If you have thicker or more angular brows, pay extra attention when applying moisturizer to avoid buildup in the arch. For finer or sparser brows, be gentle during cleansing and brushing to prevent hair loss and preserve shape. No matter your brow type, regular upkeep will help you enjoy bold, defined brows between tints—and make each DIY session easier!
6. Troubleshooting Common Mistakes
Even with the best DIY eyebrow tinting techniques, it’s easy to run into a few hiccups—especially when working with different brow shapes. Don’t worry! Most common mistakes can be fixed at home with a little patience and the right approach. Below, we’ll walk you through solutions for the most frequent issues, so your brows look flawless and natural.
Over-Tinting: When Brows Turn Too Dark
Quick Fixes
If your brows come out darker than you’d hoped, don’t panic. First, try gently washing them with a mild facial cleanser or a bit of clarifying shampoo. This often helps to fade excess pigment. For more stubborn color, use a paste made from baking soda and a drop of water—apply it to your brows and wipe away after a minute or two.
Pro Tip
Avoid scrubbing harshly; this can irritate your skin and make things worse. Repeat gentle cleansing once or twice as needed over the next day or two—the color will naturally soften as well.
Uneven Color: Patches or Streaks
How to Even Things Out
If you notice patchy areas or streaks after tinting, try using a clean spoolie brush to blend the color while the tint is still processing. If you spot unevenness after removal, you can carefully reapply a small amount of tint only to the lighter spots for just a couple of minutes—keep a close eye on it!
Blending Solution
For minor unevenness that doesn’t require more dye, try using a tinted brow gel or powder to fill in and balance out your brows until the tint fades naturally.
Tint Outside Your Brow Shape: Coloring Mistakes
Cleansing Up Edges
If you accidentally get tint on your skin outside your desired brow shape, act quickly. Use a damp cotton swab with micellar water or makeup remover to wipe away unwanted color before it sets. For stubborn stains, a little olive oil on a cotton pad can help lift pigment without irritating your skin.
Expert Advice
Always outline your desired brow shape with petroleum jelly before applying dye—this creates a barrier that makes cleanup much easier.
General Tips for Flawless DIY Brow Tinting
- Do a patch test every time—even if you’ve tinted before—to avoid allergic reactions.
- Set up good lighting and use magnifying mirrors for precision work, especially if shaping arched or angular brows.
- Keep all tools clean and sanitized for consistent results and healthy skin.
No matter your brow shape—straight, arched, round, or angled—a little troubleshooting know-how ensures you can fix common DIY eyebrow tinting mishaps confidently. With these solutions on hand, you’ll enjoy beautifully tinted brows that perfectly frame your face!